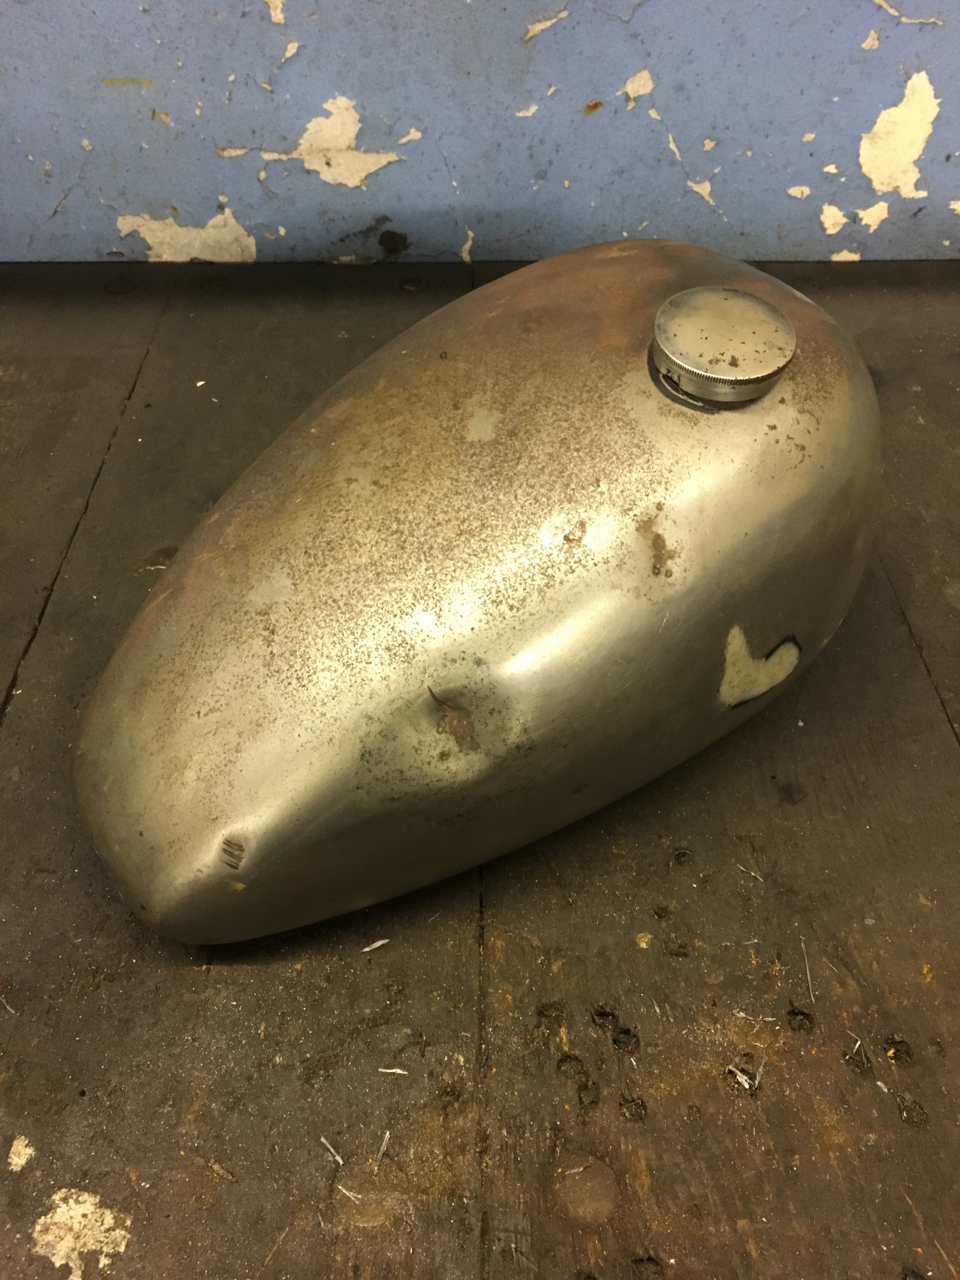
A few years ago I came across this tank at a swap meet and had to have it, even though it had a few dings in it and some filer, that didn't really matter. But I had no use for it, so I put it on a shelf in the lockup, leaving it there to wait for the right time. And that time is now.
I've always liked the shape the wessel tank has and the flow it gives a bike. After getting this new frame into its roller state I threw the tank on to see how it sat.
But how it sat was way too low on the frame. For me it didn't follow the lines from the bars to the seat, so it was time to cut the tank up and make it how I wanted it.
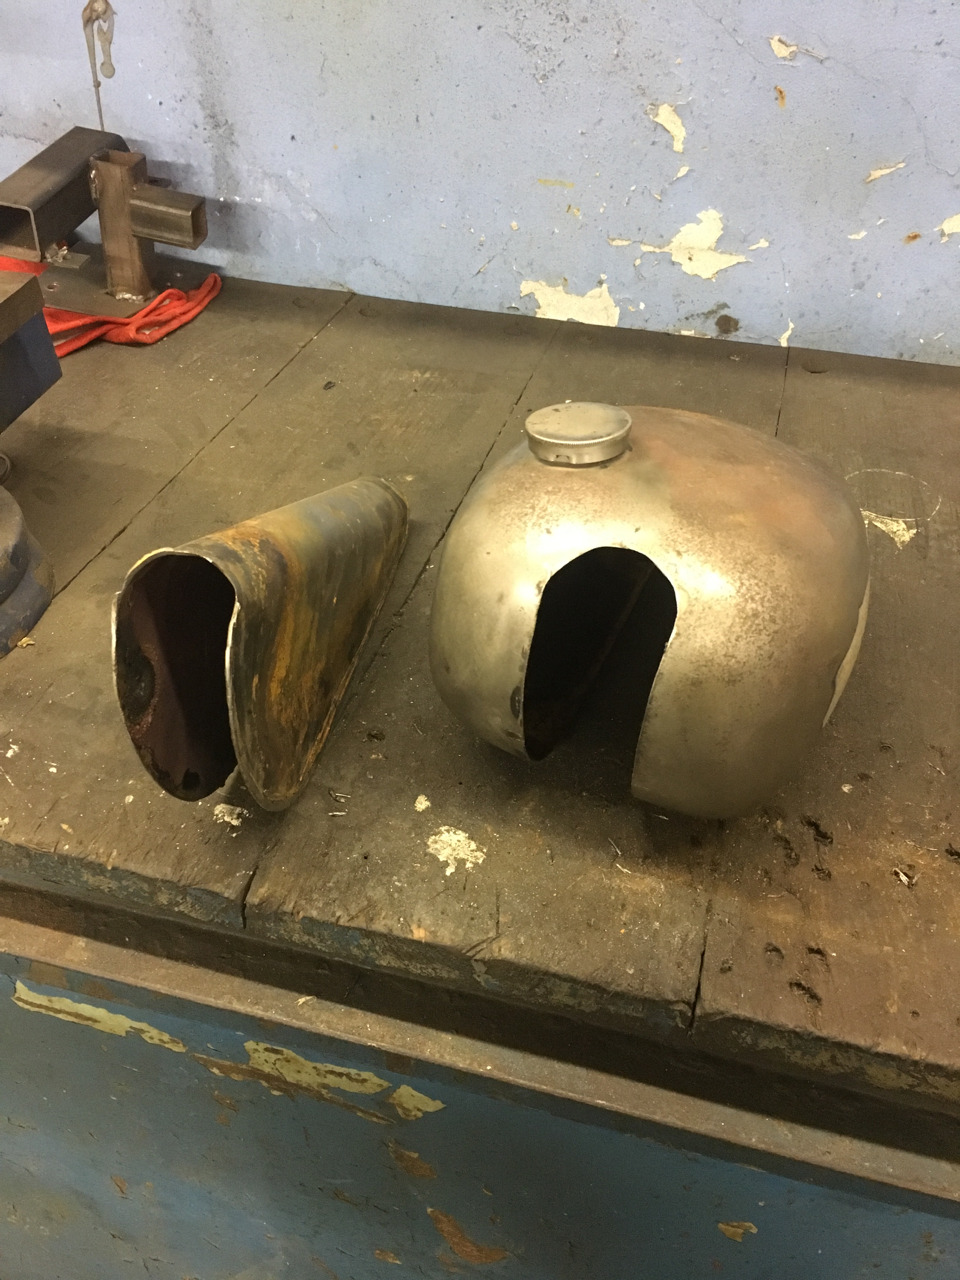
First up was to cut the original tunnel out. Once I'd done that I could see there was a bit of rust internally, so I took a bit of time to clean all of that out, and as the tunnel was apart I knocked the dents out for the inside too.
That tunnel was in a bit of a sorry state so I decide to make a new one, picking up some fresh steel so I could bend the sheet. I didn't have a bender or rollers for doing this job so I did what I could.
I used a piece of round tube I had that's the same diameter as the top tube of the frame, and clamped that to my work bench over the top of the steel. With a bit of force I managed to bend it round for the new tunnel.
Now I had a nice new tunnel I needed to sort out what height I wanted to sit the tank at.
I decided on something of a mid height, which seemed to fill the gap from handlebar to seat real nice.
With moving the tank higher away from the tunnel it also left a good size gap at the front. So I made a nice little template of the gap,
Cut it out of steel,
Then bent it up in the vice to match the shape of the tank.
I then got that all welded in nicely to fill the gap.
I'd been thinking about different ways on mounting the fuel tank, as I wanted to do something to hide the mounts so they didn't distract from the shape of it.
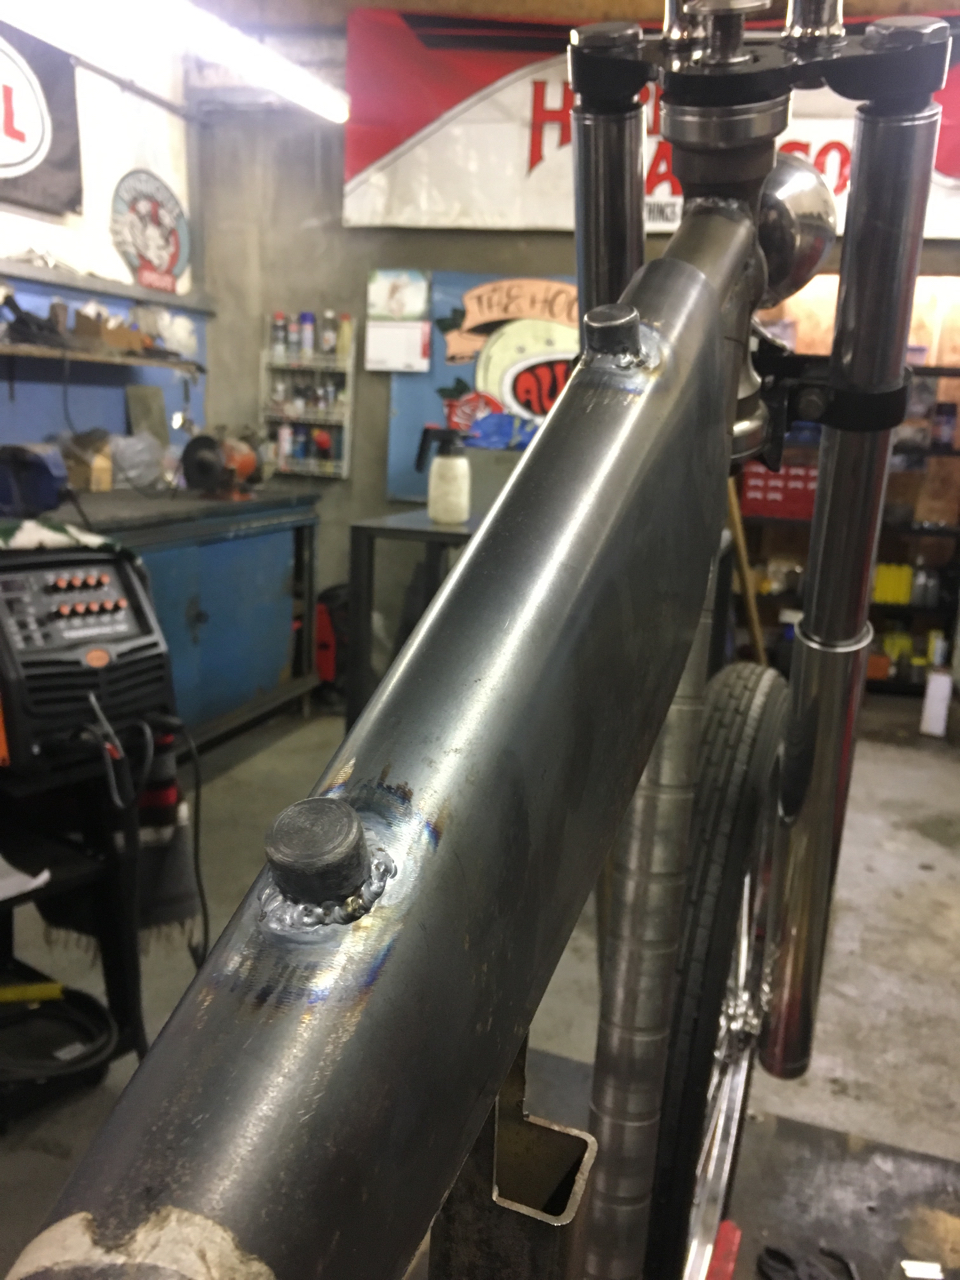
I decided to run the mounts through the frame straight into the tunnel of the tank, and started this off by making two threaded bosses to weld onto the tunnel.
Next up was to make two bosses to run through the frame, with one end counterbored to allow an Allen Key bolt to hide inside.
I drilled two holes in the top tube for the counterbored bosses to be fitted into,
Leaving the top side of the bosses protruding from the frame so the threaded bosses in the tunnel have a square edge to bolt down on when securing the tank.
With the bosses tightened down I next drilled two holes in the tunnel to fit over them.
To give the tunnel extra support when the tank is full of fuel I made a secondary tunnel that will sit at the top of each boss and also weld this secondary tunnel to the original one. This will help to prevent the tunnel flexing.
When the tunnel was in place I was able to put the shell of the tank over the tunnel and cut off the excess steel.
When I had the tank securely in place I was really happy with the positioning.
I'd already decided to do a bit of metal work on top of the tank, again trying to push my abilities. My idea was to run an S shaped bead from the fuel cap down the lower part of it. I started by making the shape out of welding rod to give me a vision of what I could achieve.
I went for 8mm round bar to make the shape as I wanted it to be an impact kind of feature. Again not having any professional bending equipment at the lockup I used what I had lying around to bend the steel rod for the top arch.
I noticed one of the spare chucks for my lathe is roughly the same diameter as the arch on the original shape I'd mocked up, so using one of my bigger G-clamps holding the rod to the chuck I was able to get the shape I wanted.
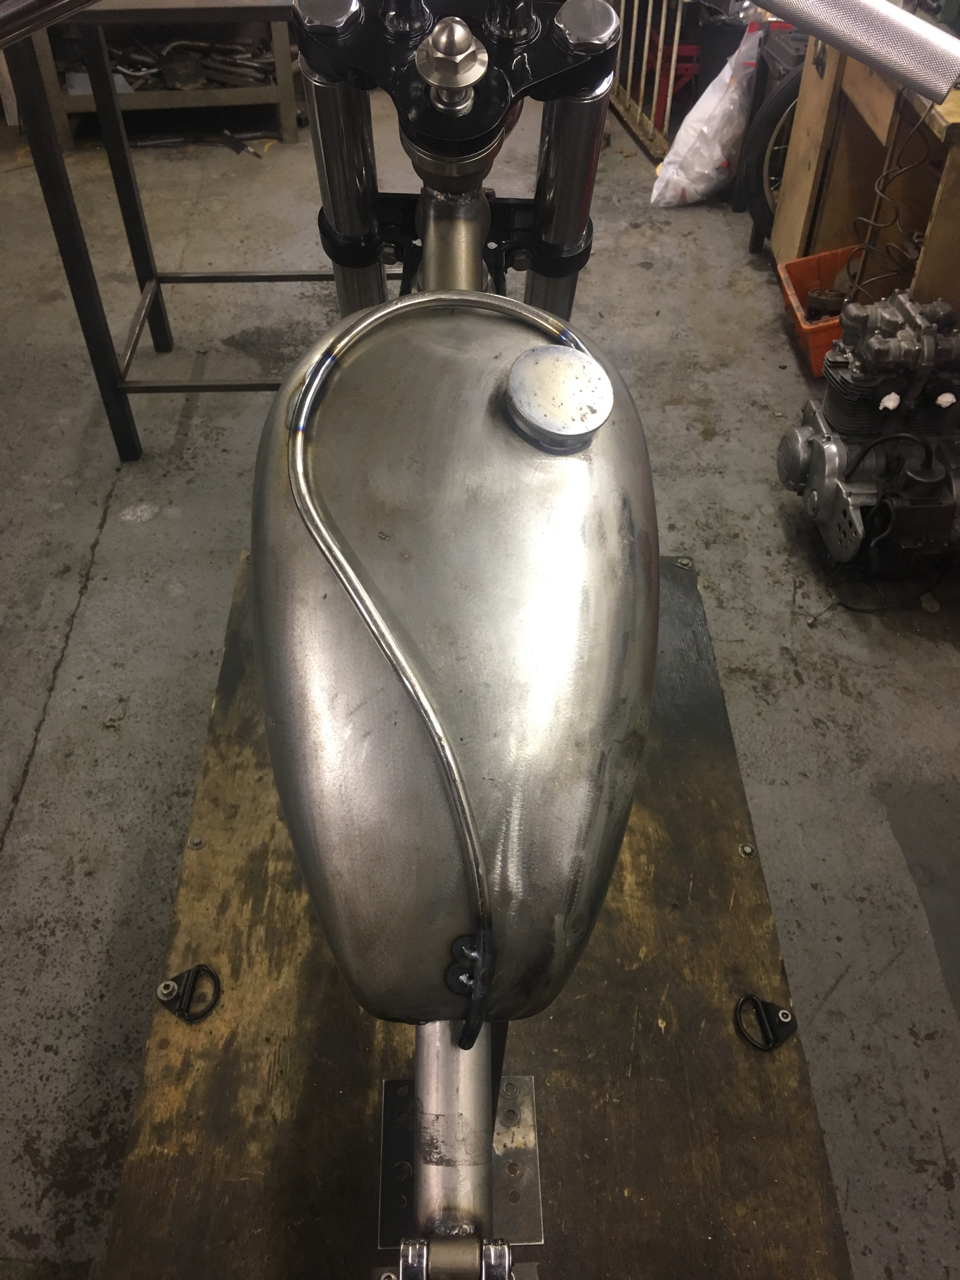
After a fair bit of bending and hammering I finally got to this stage.
Once I got to there I decided to smooth out only one side of the rod on the outside edge, leaving the inside of the rod visible.
I decided I wanted to use the weld to create a smooth transition from the tank to the top of the rod.
Using my MIG welder I went about filling the area. I was excited about this process at first but, honestly, I soon regretted it was a very time consuming process of welding and grinding, followed by more welding and grinding.
There are still a few small holes in the weld that I have used to fill the area though, so I'll use filler for these spots before going to paint.
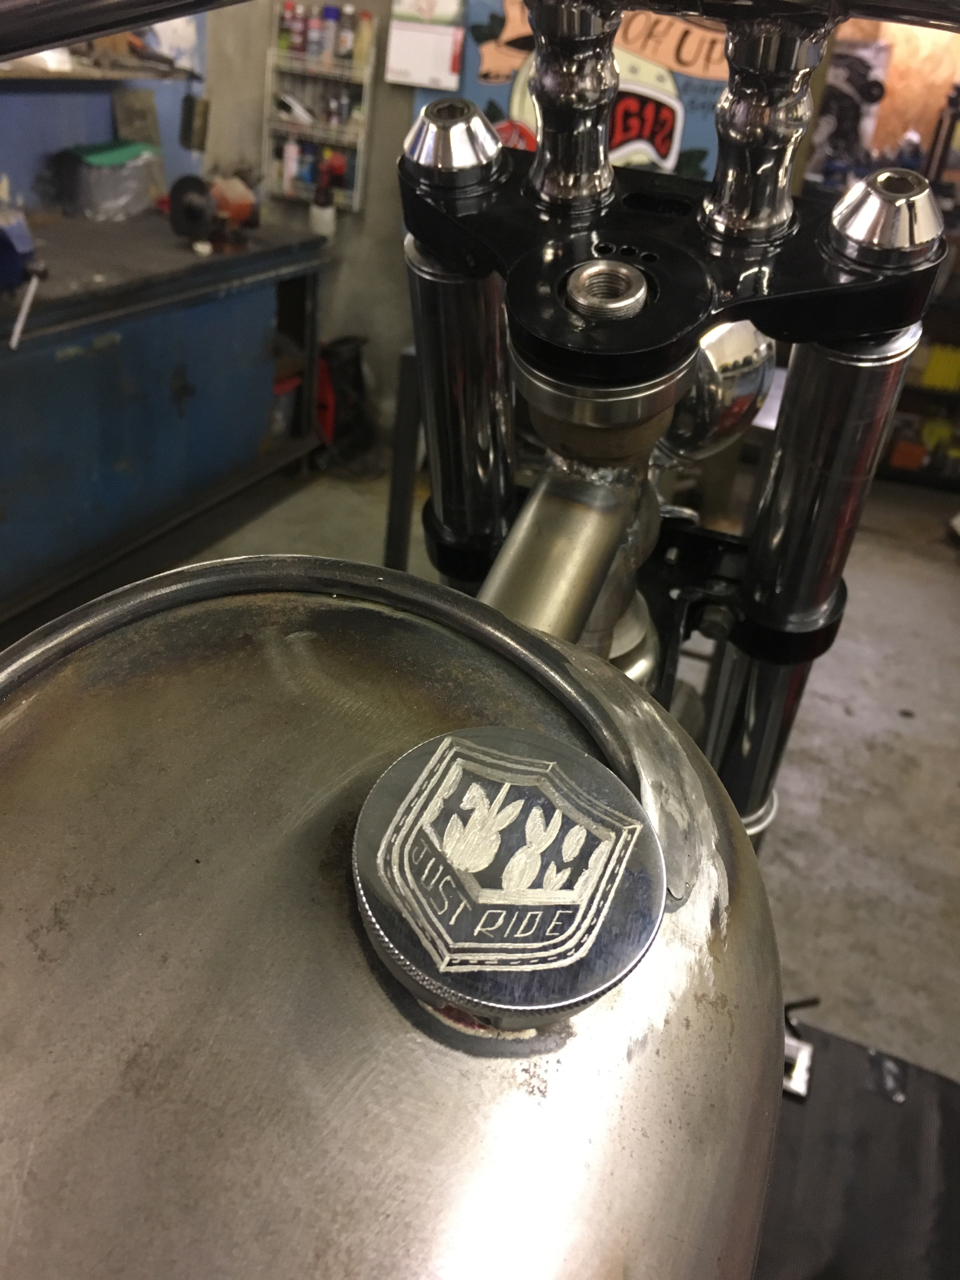
To finish the tank off I decide to buy a new fuel cap and engrave it with my clothing company logo.
Now I've finished the tank, my next job on the list is to mount the rear fender and make a sissy bar. Hopefully this won't take too long so check back soon for the next update.